


4.1 View based and Window based application
Major difference between view based and window based application is that, in view based application, we don't need for a separate view controller for initial page. But in the case of window based application, no view controllers will be present initially.
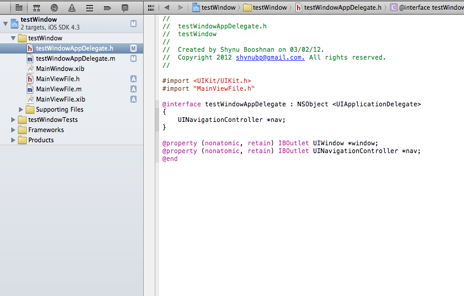
In the case of window based application, only app-delegate files with main window controller are present. Figure 4.1.1 shows the sample Xcode window for window based application.
Figure 4.1.1

From the above figure you can understand the difference between a view based and a window based application. We can add new View Controller file by right click on the project file in the left pane and choose New File.
4.2 Switching between multiple views with animation
In the above project, first we have to add new view controller file as mentioned earlier.
In app-delegate file, first we have to add some coding to push the view controller in the main Window.
For that, first import the header file name of view controller that we have created and declare UINavigation controller object in the header file, also set property for navigation controller. App-delegate header code will be like as follows,
Here , MainViewFile is the view controller file that we have created for this application.
Next step is to write code in the app-delegate implementation file. We have to write code in ,
- (BOOL)application:(UIApplication *)application didFinishLaunchingWithOptions:(NSDictionary *)launchOptions.
Write the code as follows,
nav=[[UINavigationController alloc]init];
MainViewFile *mvf=[[MainViewFile alloc]init];
[nav pushViewController:mvf animated:YES];
[self.window addSubview:nav.view];
[self.window makeKeyAndVisible];
return YES;
First we have to alloc and initiate the navigation controller and then create an object for MainViewFile view controller. Finally we have to push the view controller in to main window by using the code [nav pushViewController:mvf animated:YES];
In this Example, we have to switch between different views with animation, so first we have to create some Outlets for views in the view controller files. And we have to create actions to switch between the views with animation effect. Header file will be look as follows,
#import <UIKit/UIKit.h>
@interface MainViewFile : UIViewController
{
IBOutlet UIView *v1,*v2,*v3;
}
-(IBAction)goView2;
-(IBAction)goView1;
-(IBAction)goView3;
@end
Now we have to define the actions in implementation file as follows,
 |
Now connect UIView outlets and Run the application. Finally we will get the output as follows,

Animation effect can be given by using following coding.
[UIView beginAnimations:nil context:NULL];
[UIView setAnimationDuration:1.0];
[UIView setAnimationDelegate:self];
[UIView setAnimationTransition:UIViewAnimationTransitionFlipFromRight forView:v2 cache:YES];
[self.view addSubview:v2];
[UIView commitAnimations];
We can set different types of animation effect for our view by using setAnimationTransition property for UIView. Here UIViewAnimationTransitionFlipFromRight is used as transition animation. User can set animation as per the requirement.
4.3 Tab bar controller operations and implementation
Tab bar view controller is the essential object for an iPhone/ iPad application. If the user wants to switch between multiple view controller without the navigation effect, then we have to use tab bar controller. Each tab bar item contains a view controller and we can set many number of items as per the requirement.
We can set navigation controller inside a tab bar item. The Tab Bar application template. The following Try it Out uses the Tab Bar Application template to create a project and shows what a Tab Bar application looks like.
First we have to create a window based Xcode project. After that, add one view controller file and push that in to main window similar to previous example. Now , create two more view controllers for tab bar items.
In the mainViewFile.h view controller file, add an outlet for Tab bar controller. And in the implementation file's viewDidLoad function, write the code as follows,
tab.view.frame=self.view.frame;
[self.view addSubview:tab.view];
Now come to interface file, click one tab bar item, in the attribute window set title and image for tab bar item. In the class window, set the class as FirstView.h (FirstView and SecondView are two view controllers that we have crated to assign for tab bar items). In the attribute window, change the nib name as FirstView. Similarly do the same for SecondView .
 |
Build and run the application. We will get the output as follows,
 |
4.4 Navigation Controller in iPhone
We can use the previous example for implementing navigation controller. For that first create the application as previous one, then add two more view controllers in the project.
In the FirstView.h file , import the header file for ThirdView, because we are going to navigate from FirstView to ThirdView. Create one action to navigate purpose. FirstView.h will be look as follows,
 |
In the implementation section, define the action as follows,

Similarly we have to write codes for navigation between third and fourth view controllers. After finish with the codings we have to connect actions and outlets in xib file as shown in figure,
 |
These are the steps we have to do for implementing navigation controller in our application. Since we are using tab bar controller, we have to do additional steps to implement navigation inside the tab bar controller.
For that, first we have to drag and drop the navigation controller from object pane to tab bar item as shown below,

Since we are using navigation inside the First item, we have to drop the navigation controller above the FirstView item.
Next we have to drag the FirstView item and replace it with the view controller in the navigation controller as shown below,

Finally drag and drop the navigation bar delegate to First View. i.e. Right click on the navigation bar and drag and drop that in to First View then connect the delegate.

Build and run the application. You will get the output as follows,
 |
1 comments:
Good Work.,
Post a Comment